34
I haven't done a ton of DIY stuff on the blog and I am trying to get better at sharing things I do around here. I recently found this wood glider when I was poking around Goodwill a couple of weeks ago and I thought, you know, that could be a pretty easy makeover. It was marked at $25, which of course was was to much in my eyes so I asked one of the workers if they could go down on that and she gave it to me for $14! That I could handle so I happily brought it home. The wood color was not something that would fit in my home and it had no cushions of any type so I came up a plan. Paint (of course) and making a sort of cushion for the bottom. I will walk you through it all but first, here is what it looked like before I got my hands on it.
Someone decided this was his new bed at the time so sorry I didn't take a better picture without the pillow and blanket. You do get to see the color of the wood. In the picture below you can see the seat. Its just some fabric stapled over the springs in the chair.
The first thing I wanted to do is paint it. I decided to try out Home Depots Chalky paint to see how it compares to some of the well known chalk paint. It worked pretty much the same except some of the paint discolored due to the finish on the wood. I am not sure if that would have happened with some of the better brands. Either way it wasn't bad for the price. Painting this thing was a bit of a pain. It took several coats and a lot of turning the chair in different angles to get to all the nooks and crannies!
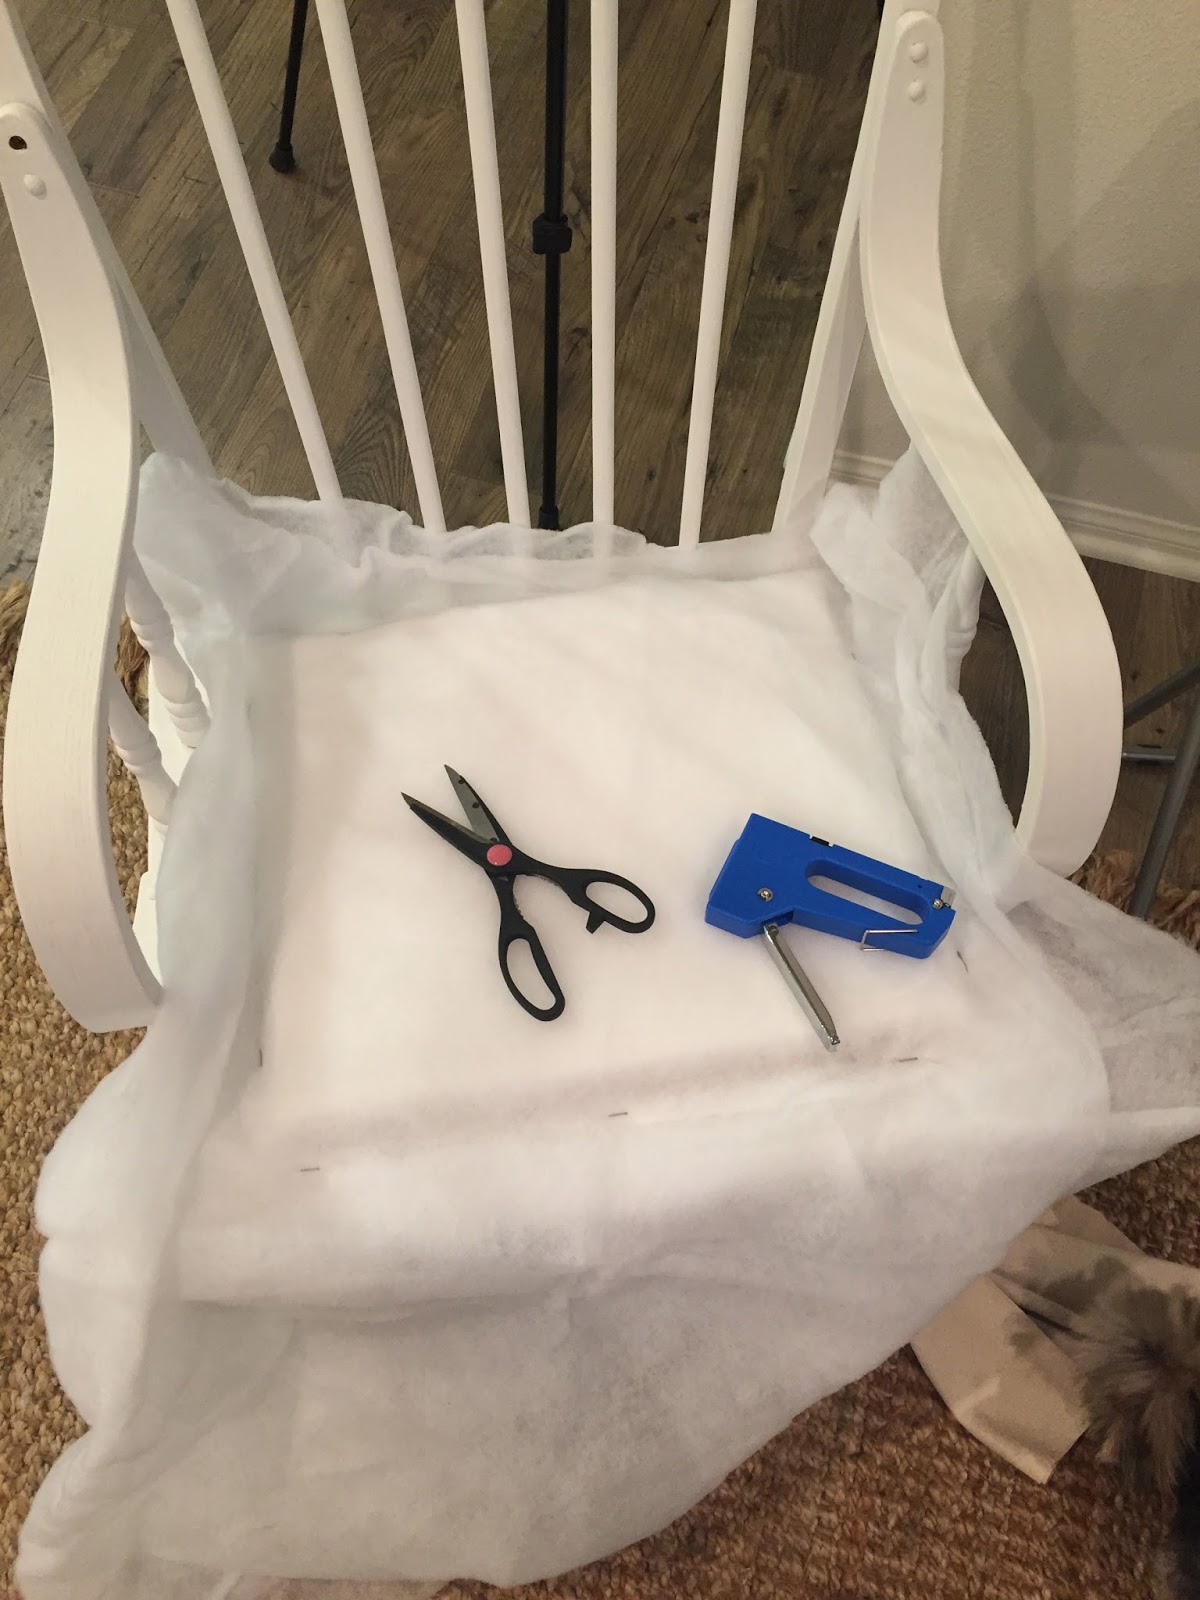
Once painted I decided to make a cushion. I don't sew so the best way for me was to buy some foam and batting, staple that down onto the chair, then nail down fabric over that. So off to the store I went.
-Staple gun ( I already had)
-Hammer and Scissors (also already had)
-Staples
-Foam cushion
-Batting
-Fabric (I ordered an old grain sack off of Etsy)
-Nail heads
The foam was already the right size so I placed that down and then cut the batting to a little bigger then the foam so it would cover the foam completely. (Sorry about all the night shots, I do most projects in the middle of the night!)
Once cut I stapled down the batting to the chair. I actually ended up pulling some of these out when putting the nails in but it held it in place while I was nailing.
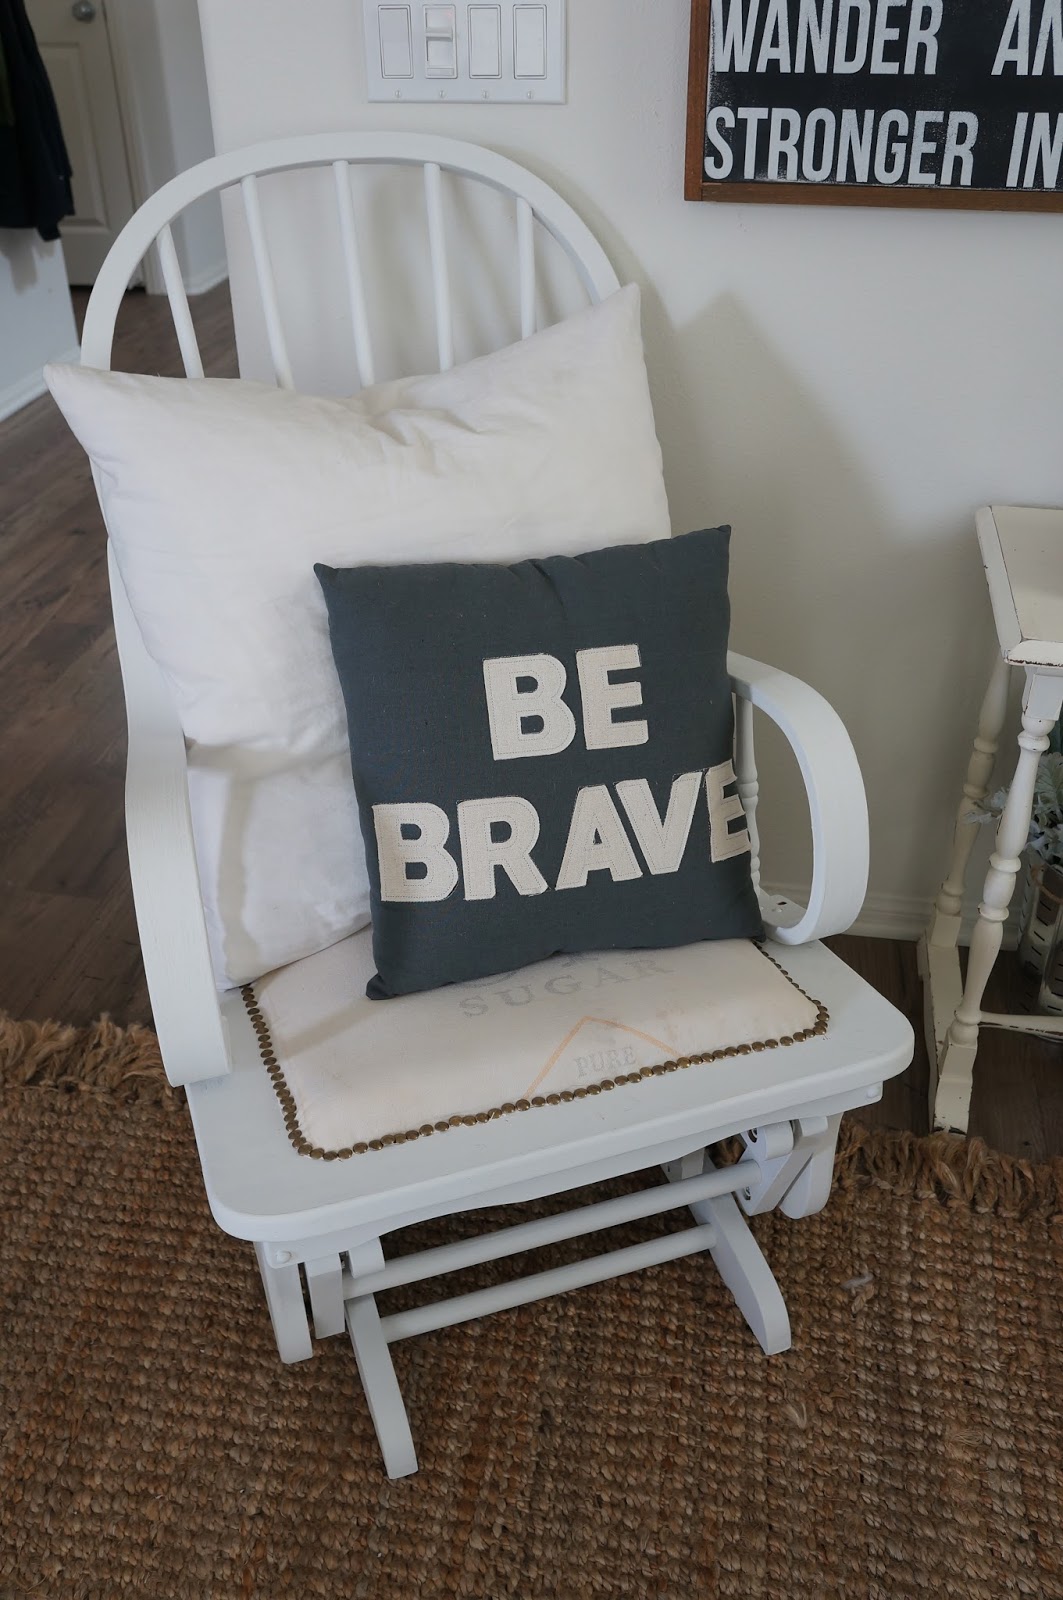
I then cut the grain sack at the seam and then laid it out how I wanted it. I got a good deal on this one because of the stain on the fabric but I knew I didn't need that part so it worked out perfectly! I wanted the writing to show to add some character. I cut that to size (to fit over the batting and cushion).
I then nailed the tacks all the way around the border. Again, not a quick option. It took a little trial and error but I finally got it done. The best way was to roll the fabric up under the batting a little to make a clean edge and then nail it down into place. This was you don't see the threads where I cut the fabric. Its not perfect, not in a perfect line, but thats the beauty in it right? I wanted it to look hand done and fun, not perfect! This entire project was a learning experience!
Finally the finished product! It took a bit longer then expected (like pretty much every project I do!) but I really like how it turned out. It is super comfortable to sit in, especially with the large pillow to lean against so all in all I think this transformation was a success.
I picked up the chair to go in this spot in my house but since its a glider I am not sure its going to work here (not enough room for the chair to rock). After all that work I may have to turn around and sell it but it was a lot of fun to up cycle either way! What do you think? Would you do things differently? I would love to hear from you! Thank you so much for stopping by as always! You all keep me motivated to do the things I love and I appreciate every one of you!